Friday, October 24, 2014

Cooking with Lee Kum Kee Menu Oriented Sauces: Lemongrass chicken wings (香茅雞翅)

We now come to the final dish of the Lee Kum Kee cook off using the Menu-Oriented sauces. I guess the best is always saved for the last? Well, according to my family whom tasted all four dishes, they ranked this their top favorite. That's  Lemongrass chicken wings (香茅雞翅). Perhaps its the nice aromatic lemongrass marinate that made the chicken wings finger-licking good! And you cannot, I'm  serious, cannot stop at one :9
How do you usually cook lemongrass infused dishes? I reckon the usual procedure will be slicing or pounding the grass to get it's natural juices out. Some would even blend the lemongrass into puree to get the maximum aromatic infusion. However, I am sure you had experienced before that "husk-like" texture of the grass when "accidentally" eaten and it ain't that palatable if you know what I mean. :P

So using this Lemongrass marinate from Lee Kum Kee actually eliminates the whole procedure as mentioned above. So convenient and it is not only strong in lemongrass flavoring, it is also well seasoned. No extra salt or sugar is required when you cook this dish....cool right. ;) 

Let's get on with the recipe then shall we?
Okay, that's pretty much it. Lee Kum Kee lemongrass marinade plus chicken wings..period. Of course you can opt for other protein. But if you want a quick cook meal and have only 30 minutes to spare...I suggest chicken wings, it cooks and tenderized much easier.

Add the marinate to the chicken wing joints. Rub in the marinade and let sit for a good 5 minutes before cooking it. Go do you other dishes and chill this in the fridge!

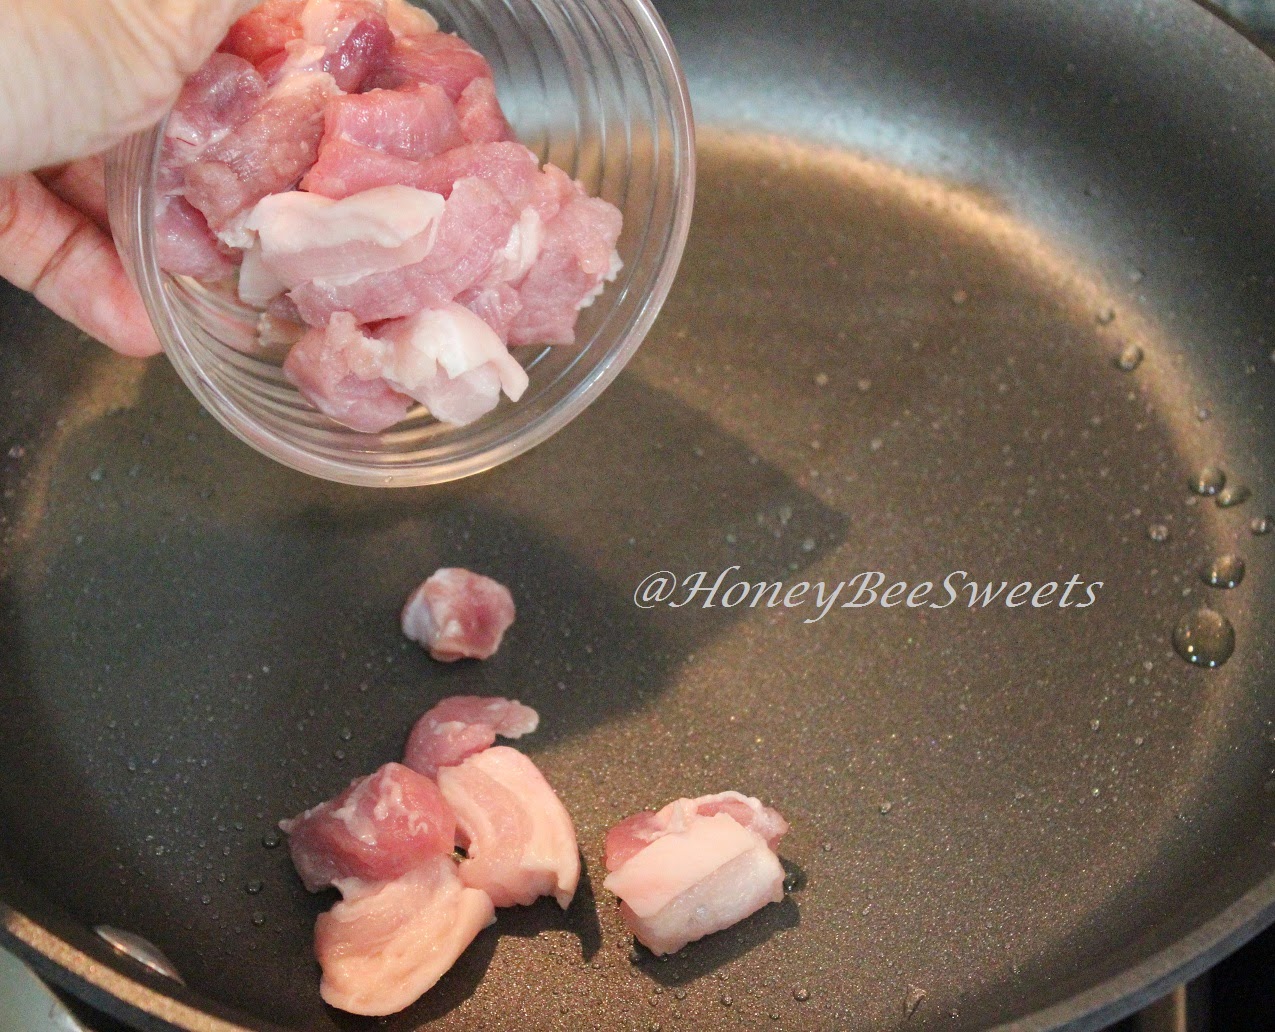
After 5 minutes, heat a pan with 1 tsp of oil at medium low heat. Add in the marinated chicken wing joints. *Remember not to wash the marinating container after you remove the wings later. You need the left over marinade!*
Cook the chicken wings in the pan and keep a watchful eye over them. It might burnt relatively easily, so stir the wings around occasionally.
Yeah I almost burnt my chicken wings! But luckily it was just small bits on the skin haha! And somehow it turned out really yummy with the charred bits! At this point when the chicken wings are slight golden brown on the outside. Add 1/2 cup water and 1/2 tsp of corn starch into the marinate sauce that is left in the marinating container. Mix well and add into the pan with the chicken wings.
Reduce the fire to a simmer and cover the wings to let braise for a good 10 minutes. The liquid should slowly reduce and become thick.
By now, the chicken wings should be tender and well coated with the lemongrass sauce...so yummy. :9 Dish up and serve!
Ingredients for  Lemongrass chicken wings (香茅雞翅) (Serves 4)  
10 chicken wings, cut and cleaned
1 packet of Lee Kum Kee Lemongrass Marinade sauce

Thickening sauce : Left over Lemongrass marinade + 1/2 cup water + 1/2 tsp corn starch
  • In a mixing bowl, add chicken wing joints and LKK lemongrass marinade in. Massage the marinade on the chicken wings.
  • Let the chicken wings sit for a good 5 minutes in the fridge.
  • Heat up the cooking pan with a teaspoon of cooking oil with medium low fire.
  • Add in the marinated chicken wings. Do not toss the marinade left in the mixing bowl, set aside for use later. Keep watch and make sure you don't burn the wings!
  • Mix 1/2 cup of water and 1/2 tsp of corn starch to the marinade mixing bowl and combine well with the left over marinade sauce.
  • After the wings changed colour, to a slight golden colour, about 5 minutes, add in a the marinade sauce water mixture. '
  • Lower the fire to a simmer and cover the wings. Cook for a good 10 minutes until the liquid has thicken up and the chicken wings are cooked through and tender.
  • Dish out and serve while still warm. Enjoy!
Tadah! I mean how easy can this be? And it is so delicious too! Perfectly seasoned without having me to worry a single thing. I have to say this easy Menu-Oriented marinade packs are just perfect for busy people that wants to serve a decent meal for the family when they seriously have no leisure what so ever to cook the traditional way. My kids didn't even know it was from a package heehee...shhhh!

Thanks again to Lee Kum Kee for giving me this opportunity to participate in this fun challenge! I truly had fun cooking and blogging these recipes. And if any of you are interested in cooking any of the four dishes I introduced these few days...look out for these Lee Kum Kee packages:
These Menu-Oriented ready packs from Lee Kum Kee can be found in any major grocer, like NTUC, Cold Storage and also Giant. 

Here are all the links of the other recipes in case you are interested. ;)
Thank you so much for going through this whole cook off with me. And I appreciate your patience and interests in my posts. Do try them out and let me know how you like them!

Have a great day guys!


Thursday, October 23, 2014

Cooking with Lee Kum Kee Menu Oriented Sauces: Prawn tomato omelet with egg tofu (蕃茄明蝦炒蛋)

Adjourning to the third recipe for this Lee Kum Kee using the Menu-Oriented sauce packs; Prawn tomato omelet with egg tofu (蕃茄明蝦炒蛋)
This third dish is actually quite a common and popular one among many household. I am sure many of us cook prawn omelet or tomato omelet before. I was thinking, why not perk it up a notch using Lee Kum Kee's Menu-Oriented Tomato Garlic Prawn sauce?
Looks so shiok isn't it? Such a wonderful dish to go with warm steamy rice! Sure reminds me of childhood and my mum's cookinh. ;9 So let's get started shall we?

A look at what we need for this dish:
Egg tofu, Lee Kum Kee Tomato garlic prawn sauce, a large fresh tomato, 5~6 fresh prawns and 2 eggs. Feel free to add more of any ingredient. :)
Personally I love egg tofu...fried haha! That creamy texture is so comforting. And if you have not tried cooking it with an omelet, you should totally try it. :9 
Before cooking, cut up all the necessary ingredients. I love the fact that I do not need to chop garlic since it is one of the more time consuming preparation work for me :P
Peel and devein the prawns, cut the egg tofu into smaller discs and slice the tomato into wedges. This takes like 5-7 minutes tops...yes peeling fresh prawns is easier then cooked prawns!
Heat up the cooking pan and add 1 tbsp of oil. Pan fry the egg tofu till slightly golden on both sides. Takes a minute on each side. Careful...it splatters, so pad dry the tofu discs before frying.
Next add in the prawns and tomato wedges at the same time. Stir fry gently not to break the egg tofu.
Once the prawns start to turn pink, add in the Lee Kum Kee Tomato Garlic Prawn sauce. Give it a stir and make sure everything is coated with the sauce.
Lastly you add in the beaten eggs. Cook for a minute or two or till the eggs just about to set and yet still creamy. Dish up and serve immediately. :9 So simple isn't it.

Ingredients for Prawn tomato omelet with egg tofu (蕃茄明蝦炒蛋)
1 package of Lee Kum Kee Tomato Garlic Prawn Sauce
5-6 large prawns
1 tube of egg tofu
1 large tomato
2 large eggs, beaten
  • Slice the egg tofu into discs and cut the tomato into wedges. Peel and devein the prawns. Set aside for use later.
  • Heat up 1 tbsp of cooking oil on the pan at medium fire. Pad dry the egg tofu discs and gently place them in the heated pan and pan fry on both sides till golden brown. About a minute on each side.
  • Add both prawns and tomato wedges in and stir fry till prawns start to turn pink.
  • Add in the Lee Kum Kee Tomato Garlic Prawn sauce and stir fry to coat the ingredients evenly.
  • Lastly, add in the beaten egg and cook for a couple minutes till the eggs are almost set. Remove from fire and dish up to serve. Enjoy!
This dish spells comfort all over. Somehow that tomato tangy, garlicky flavor is just so inviting. The sweet crunchy prawns, creamy egg tofu in that well coated and flavorful omelet is perfect. There is a slight spicy kick to the sauce..which actually brightens up the whole dish. I can have this dish alone and nothing else! So good. :9

Hope you guys will give this simple yet fabulous dish a try. I know I will be cooking it more and more often now since with the ready pack sauce from Lee Kum Kee around. :))


Wednesday, October 22, 2014

Cooking with Lee Kum Kee Menu Oriented Sauces: Black Pepper Pork Rib soup with Green Marrow (黑胡椒排骨毛瓜湯)

The next recipe in line is a simple Black Pepper Pork Rib soup with Green Marrow (黑胡椒排骨毛瓜湯). In my household, we always have soup on our dinner table...even though we are not Cantonese haha! It all started when my elder child being a picky eater while young. So having soup during mealtimes, especially good nutritious soup is essential. Well if the kid is not eating much, at least the soup will fill the belly and give some good nutrition. :)

I am always looking for easy soup recipes that not only is wholesome but tastes good as well. So it is actually great that Lee Kum Kee comes up with these ready pack soup base that makes our lives much easier during dinner preparations. Black pepper being the king of spices, contains a good source of many anti-oxidant vitamins such as vitamin-C and vitamin-A. And do you know that peppercorns composes of health benefiting essential oils such as piperine, an amine alkaloid, which gives strong spicy pungent character to the pepper.

Enough said. Let's get on with it shall we?
Let's see what we need in this simple delicious soup recipe. :)
I like my soup full of tasty ingredients(多多料), which essentially also makes the soup "sweeter" too. :9 This time I opted for Green Marrow(毛瓜) which has a cooling effect, plus it is rich in vitamin A and vitamin C. Also using fried beancurd skin and fish paste to make my own Tau pok Yong Dao Fu (豆皮酿豆腐) :9


Gently cut the Tau pok diagonally into two triangles and slit the cavity without cutting all the way through. Then gently stuffed the fish paste into the cavity. Chill in the fridge till needed.
Then start boiling some water in the pot. Once it boils, turn off the fire and par-boil the pork ribs.
This is a step that I always do and I think you should too. Be it you are cooking chicken or pork rib soup, this par-boiling removes all the impurities and some fatty oil of the raw meat. Might be troublesome but essential, so don't skip.
Remove the water once the meat turns opaque...takes like a few seconds. Fill the pot with more fresh water and start the fire again.
Next you add in the Lee Kum Kee Soup Base for Black Pepper and Pork Bone. Up the fire to highest and bring it to a boil. Once it boils, reduce to simmer.
In the meantime while the soup is boiling, prep your vegetables. Peel the green marrow, and remove the seed sections as seen above. Cut the carrots into bite size.
After the soup has been simmering for 15 minutes, add in the stuffed tau pok and vegetables in. Up the fire again and bring to a boil. Once it starts boiling, reduce to medium low and let it continue to a small boil for 5-7 minutes. Then off the fire and its ready to be served. :9

Ingredients for Black Pepper Pork Rib soup with Green Marrow (黑胡椒排骨毛瓜湯)
250g spare pork ribs
1 pack of Lee Kum Kee Soup Base for Black Pepper and Pork Bone. 
1 Green Marrow
1 medium to small carrot
150-200g fish paste
4 Tau pok (fried beancurd skin)
  • Cut the Tau pok diagonally into two triangles and slit the cavity without cutting all the way through. Then gently stuffed the fish paste into the cavity. Chill in the fridge till needed.
  • Heat up some water in the pot and par-boil the pork ribs. Remove the water and refill with fresh water and add in the Lee Kum Kee Black pepper pork bone soup base in and give it a good stir to mix in the paste.
  • Up the heat and bring to a boil, then lower the fire to a simmer. Simmer for 15minutes. 
  • In the meantime, peel and cut the vegetables into chunks as shown above.
  • Add the stuffed tau pok and vegetables in and again bring to a boil. 
  • Once boiling, reduce to medium and small bowl for 5 minutes.
  • Off the fire and serve while still hot. Enjoy! 
The slight heat from the black pepper is balanced off really well with the cooling green marrow. My kids actually enjoyed this soup very much despite the peppery taste. The sweetness from the fish paste and pork ribs also makes the soup extra flavorful and so perfect for cooling days like today. ;)

Hopefully you will give this recipe a try, I personally love it very much. Happy boiling!

Tuesday, October 21, 2014

Cooking with Lee Kum Kee Menu Oriented Sauces: Korean Kimchi fried rice (韓式泡菜炒飯)

It took me awhile to finally get to this Lee Kum Kee MOS Blogger Competition. The challenge for this cook off is to complete all 4 dishes in 30 minutes using Lee Kum Kee's Menu-Oriented sauces. It ain't an easy task, but doable...since I do cook everynight and estimating the time is my specialty haha!

Just imagine there is a lot of multitasking going on, cutting while cooking, chopping and stirring! So planning what to cook and how to do it is a MUST before getting started. Furthermore, am in the midst of my kids exam so having to complete this fast may not be all bad haha! After all the planning, grocery shopping, cooking and lots of picture taking, we have ourselves a 1 soup and 3 dishes dinner, all using Lee Kum Kee Menu-Oriented sauces.

Bare in mind that all my dishes are based on serving 4 people. You can double the amount and change your ingredients as per need.

In this first post, I will be sharing the recipe for Korean Kimchi fried rice (韓式泡菜炒飯) using Lee Kum Kee's Korean Marinade.
With the use of the Korean marinade, this Korean style fried rice is really easy to cook! Let's have a look at what we need for this dish:
Overnight rice, or just cooked version will do too. Since I only eat brown rice, I am using brown rice for this recipe. Feel free to use short grain Japanese or Jasmine rice. Obviously Kimchi fried rice requires Kimchi, so do remember to get a pack before cooking this. ;) I am using pork belly since I feel it will be more fragrant with the Lee Kum Kee's Korean marinade. :9
First off, just fry the egg that will be used to top off the dish later...can't get any easier then this. Takes less then a minute. ;) Then remove egg and add in the pork belly chunks.
Cook it for a minute to let the fat render a little. Next add in the Lee Kum Kee's Korean Marinade.

Continue to stir fry with the sauce all coated on the pork belly, takes about a minute for the flavors to go in. Feel free to substitute the pork belly with any other protein you prefer.
Next you add in the cooked rice over the pork belly. Keep in mind you can add more Lee Kum Kee Korean Marinade (like 2 packs) if you need to cook for more then 4 people, meaning more then 2 cups of rice. Or you can keep it mild in flavor by just leaving it as one marinade package.
Give it a good stir so that the rice will be coated with the marinade as well. 
Next you add the kimchi into the fried rice. You can add as much as you fancy! But I kept it to 2 to 3 tbsp since I do not want it to overpower the taste of the Korean Marinade. :)
Lastly add in the green onion for extra crunch, colour and flavor. Totally optional.

Scoop out the rice and top it off with the egg...tadah! How easy is that? And it taste great too, yum! ;9 Now let's look at the recipe:

Ingredients for Korean Kimchi fried rice (韓式泡菜炒飯) 
1 package of Lee Kum Kee Korean Marinade (韓式醃醤)
fried egg to top off the rice

2 to 3 tbsp of Kimchi (buy sliced version, any brand will do)
100 g pork belly, slice thinly
2 cups of cooked rice
2 sprigs of chopped green onion
fried egg to top off the rice
  • In a heated pan, fried a sunny side egg. Remove from fire and set aside to top off the rice later.
  • Add the pork belly into the hot pan and cook for a minute or two to render some of its fat out.
  • Add Lee Kum Kee's Korean Marinade to pork belly and stir fry to coat the meat. Cook for a minute. Cook at medium low fire.
  • Next add in the cooked rice and give it a good stir to coat the rice with the marinade too.'
  • Then you add in the Kimchi and fry it in. Last you add in the chopped green onions and stir.
  • Remove from pan and dish up. Top with sunny side egg and serve while still warm. Enjoy!
Hope you will give this recipe a try. Having Korean style fried rice has never been easier! Of course with the use of Lee Kum Kee. ;)

Do stay tune to the next 3 recipes which I will be posting up in the coming days. Do give support and come like my picture in Instagram (ig_honeybeesweets). Thanks!

Pleasant evening everyone!

Thursday, October 16, 2014

Sweet Potato Bread with Oreo Crumb Filling

After seeing the recipe from Carol, I was really inspired to try it out myself. Somehow the lure of using a root vegetable in bread recipes is just too inviting. Plus the use of Oreo in this recipe which most kids adore, like mine, will make it super delicious. The orange and black colour also works in the Halloween theme really well too...or perhaps its the colour of the bumblebee? 

But since I have some lovely orange sweet potato at home, I decided to give the recipe a minor twist use sweet potato instead of my usual beloved pumpkin. :)
Really loving the contrasting colours of black and golden yellow. Feel free to use pumpkin if you like

As promised, here is the recipe for the bread:

Ingredients for Sweet Potato Bread with Oreo Crumb bread
370g bread flour
220g steamed and mashed orange sweet potato
100ml fresh milk
3g instant active yeast
1/4 tsp salt
25g caster sugar
30g unsalted butter room temp

122g (1 package roll of Oreo)-crushed  or blend into fine crumbs

  • In large mixer, add all ingredients for the bread dough except the butter and start mixing.
  • Let knead till the dough is not sticky or pulls away from the side of the mixing bowl.
  • Add in butter and continue to knead till the dough is elastic and reaches window panel stage. Meaning you can stretch a piece of the dough without breaking or tearing it and yet thin enough to see light through the thin "membrane".
  • Let the dough rest to proof till it doubles or for 1.5hrs. In the meantime, blend or crush the Oreo cookies till fine crumbs. Set aside for use later.
  • After proofing, punch out the air inside the dough and weigh out 600g. Remaining dough can be made to use small buns.
  • Roll out the main 600g dough into a rectangular about 35cm by 15cm. 
  • Spread a really thin layer of butter if desired on the surface leaving a 2 cm gap to the sides.
  • Sprinkle evenly the Oreo crumbs over half of the rectangle surface also leaving a 2 cm gap to the sides.
  • Flip the other side of the dough without the Oreo crumbs over and seal the edges nicely.
  • Roll out the dough into a long rectangle of 35cm by 15cm again (approximate is fine, don't have to be exact measurement)
  • Fold up the dough like a letter
    • As seen in the above picture, The dough is fold into a letter. Now repeat the same procedure, roll out to 35cm by 15cm again and fold. 
    • Then cut the dough into 3 strips leaving one end still attached. Then plait the three dough strip into a "Pony tail".
    • Seal the 3 strip at the end when completed and place the dough into a greased bread loaf tin and let proof for 1hr or till it fills 90% of the tin.
    • Bake in a preheated oven of 175C for 30 minutes till golden brown on the top.
    • Remove from oven and remove from the baking loaf pan after 3-5minutes. Let cool completely before slicing.

I even made simple bread pudding the following day! Well because anything baked with creamy sweet custard (and dark chocolate chunks) is love!
Recipe for the custard for 4 slices of bread:
  • 1 large egg
  • 1/2 cup heavy cooking cream
  • 1/2 cup fresh whole milk
  • 1 tsp pure vanilla extract
  • 1 tbsp powdered sugar
  • 50g dark chocolate chunks
Mix everything together till well combined. Then pour over the day old bread (not fresh bread please, it will not absorb that well) and let soak for a good 15 minutes.(Give it a good press into the liquid if necessary) In the meantime preheat oven to 200C. Place the chocolate chunks over the top and bake in the oven for 15 minutes or till the top is golden brown. 
Served the pudding warm with creme anglaise, yummmeh!
 
Hope everyone will give this a try and let me know how it goes. ;)
Breakfast are meant to be this way ya? Comforting and most importantly homemade with love!

Have a good one guys

Friday, October 3, 2014

Oatmeal Whole Wheat Pancake Beef Burgers

So this is my final review post on MaxoMixx Blender from Bosch. I wanted to do something savory instead of the usual sweet desserts which seem to be an easier option. And I didn't want to opt for soup or bisque recipes either since that was yet another obvious choice when it comes to blending. So after much consideration, I went ahead with this : Oatmeal Whole Wheat Pancake Beef Burgers. I know, you're probably going all wrinkled face with this unorthodox combo....but I guarantee you, this will change your perspective, not only on using pancakes as the other bun option, but also seeing how easy it is to whip up a gourmet burger just by having a nifty blender like MaxoMixx at home. ;) Do refer to my previous post for more reviews about this MaxoMixx blender.

Hungry? Let's get on with it! First we tackle with the protein, yes the beef patties. :) Of course you can get any beef cuts you fancy. Or you can even opt for pork or chicken too. But most importantly, I use lean cuts because I do not need the extra fats to make a moist patty...I have other tricks. Let's see what we need:
 
Yup, just these simple ingredients to make some moist and tender beef patties. Well, of course with MaxoMixx blender as well haha! Note that you will need the XL blender container for this.


 So first, you add in the bread trimmings or half a slice of stale bread in, follow by the 1/2 cup of fresh milk. Let the bread soak up the milk, maybe go check your Facebook or Instagram and come back 3 minutes later ya?
Next add in the beef, cut into big chunks. Please do not add the whole piece of beef into the blender, you do not want to overwork that blender of yours :P
Next you add in the onion, garlic, sea salt and freshly ground pepper. Last would be adding in that binder, the egg. :)
And you are ready! Mount back the MaxoMixx blender base unit and on the power switch. :)
I suggest using the Turbo blend function (bottom button) for this. Since we are chopping up some meat, it is essential to up that power level. Blend for a good 2 minutes and you can scrap the sides in between blending to make sure all the chunks has been mixed in well.
See! So nicely minced and evenly mixed right! I so love this! Next you just have to shape the meat into patties and chill for a good 30 minutes before you pan seared them.
While the beef patties are chilling in the fridge, let's get on with the wholesome pancakes!

So why pancakes? Why not just buns? Well, not all of us has a constant supply of burger buns at home if you know what I mean. :P Well, you can either toss everything aside, go right out to the grocery store and grab some if it is convenient and fast enough. Or.....you can just do what I did! Make fluffy pancakes and replace as burger buns. ;) Well, there is not rule that pancakes can only be consumed as breakfast carb option right? Besides, you can make more and save the rest for breakfast the next day! Yes, always plan ahead....and you're all set. ;) This pancake recipe I am sharing is absolutely delicious, healthy and so easy to make please. 
First you get all your ingredients ready, weigh them out and get that MaxoMixx blender with the L container all set up too. But do note that if you want to double the recipe, you will need to use the XL container instead.
Add all your weighed out dried ingredients into the XL blender container (blade in). 
Next you add in the wet ingredients, milk and eggs. Then you mount back the blender base unit of the MaxoMixx and switch on the power.
Using the blender function with the controller-able speed tuner on the top. I set to speed 7 and it was good it enough to mix up everything real good. :) After zapping for a good minute, the mixture should look like the following:
It's like thick porridge batter. Wait...that takes like...3 minutes? Or less? Cool right heehee. :) Okay, now the cooking part or you can chill this in the fridge and cook it the following morning if you're having it as breakfast hotcakes instead. :9
Spoon the batter using an ice cream like me or any ladle you fancy, and cook on medium low fire on each side till slight brown and toasty on each side.
 
Repeat till all the batter has been used up. Should make about 8-9 medium size pancakes. So after the pancakes are all cooked, get the beef patties out and cook on the same pan, with a little olive oil.
 Cook the patties till golden brown, about 3-4 minutes on each side. 

Recipe for Whole wheat oatmeal pancakes (makes 8-10 medium pancakes)
100g whole wheat flour
30g cake flour (or you can use all whole wheat flour)
1 tsp baking powder
1/2 tsp baking soda
1/4 tsp salt
1 large egg
60g instant oats
200ml fresh milk
2 tbsp soft brown sugar

  • Add all ingredients into the MaxoMixx L blender container. Blend till smooth and well incorporated.
  • Heat up pan on medium low fire.
  • Scoop batter and cook on each side for 3 minutes till light tan brown on both sides.
  • Repeat till all batter has been cooked.

Recipe for all beef patties (Makes 4)

400-450g lean beef, cut into large chunks
1/2 slice of bread or 1/2 cup of bread skin or trimmings
1/2 cup fresh milk
1 small onion 
2 cloves of garlic
1 large egg
1/2 tsp sea salt
1/2 tsp fresh ground pepper
  •  Add all the ingredients into the MaxoMixx XL blender container. Blend till all combined and well minced.
  • Divide the mixture into 4 equal portions
  • Chill in the fridge for 30 minutes
  • Heat up the pan at medium fire and add some olive oil.
  • Pan seared on each side till golden brown about 3 minutes each.

Then assemble the burger while still warm. I stacked mine with cheese and a sunny side egg. Simple and all so delicious!

Sorry guys, I have to haha! If this shot did not convince you to make some delicious pancake burgers yourself...I don't know what will. (>.<)
Do try it out and drop me a comment if you do try it and tell me if you like it! ;)

Happy Cooking everyone! And Happy Children's Day to all the precious children out there!