Tuesday, April 28, 2015

Beetroot Brownies

Since I still have one beetroot sitting in my fridge. I reckon I should get to that recipe which has been "stored" at the back of my mind since forever. Yes...Brownies with beetroot. Sounds really unusual I know, I ever since beetroot has been introduced into cakes in some bakeries (e.g Cedele), I'm pretty intrigued by it. Especially that brilliant magenta just brings so much vibrancy to it. And do you know
Beets are used along with medications in the treatment of liver diseases and fatty liver. They are also used to help lower levels of triglycerides (a type of fat) in the blood, lower blood pressure, and to improve athletic performance. How cool is that! More Beets please!

And that also explains why I did my Beetroot Bread earlier this month. ;) But you know what? This Beetroot brownie was way yummier!
Notice that hint of redness from the brownie? Yeah, it's from that all natural colouring from the beetroot, so love! And taste wise? I am gonna be thick skin and say I am pretty please with it for the first time trial haha. :P Rich, chocolaty and yes with a hint of sour from the root vegetable which surprisingly blending well with the brownie. 

Without further ado, let's check out the components we need:

Ingredients for Beetroot brownie (makes a 8" by 2" square)
250g unsalted butter
200g dark chocolate, chopped into chunks
3 large eggs
180g caster sugar
1 tbsp wildflower honey 
1 tsp pure vanilla extract
1/2 tsp salt
175g cake flour
1/4 tsp baking powder
200g beetroot, pricked, steamed and peeled
Reese's PB chips (Or you can use chocolate chips)
100g toasted walnuts (optional)
  • In a blender container, add in the peeled and steamed beetroot. Blend at high speed till smooth. Set aside for use later.
 
  • In another bowl, place over a double boiler with barely simmering water. Add both butter and chocolate chunks in. Stir constantly till the butter and chocolate starts to melt. Mix so it is well combined. Once both has melted completely, remove from heat and set aside to cool slightly which will be used later.
 
  • Preheat the oven to 170C. Grease and lined with parchment, and grease again a 8" by 8" square baking pan.
  • In another mixing bowl, crack in the 3 eggs and salt, whisk well. Slowly drizzled in the chocolate butter mixture. and whisk as you drizzle in.
 
  • Once the chocolate mixture has been all added in, sift in the cake flour and baking powder. Mix well to make sure there is no lumps.
  • Lastly, add in the blended beetroot. Again mix well till smooth.
 
  • Pour the batter into the prepared baking pan. And add the toasted walnut and Reese's PB chips on the top.

  • Bake in the preheated oven for 25-30 minutes. Once baked, remove from oven and let cool on the rack.

Note: DO NOT over-bake the brownie please. An over-baked brownie is NOT good eats. :P It will tend to be dry and hard. So it is okay that the tester comes out with some cake stain. Best way to enjoy the brownie would be to let cake to rest at room temperature before slicing. It will actually taste better the next day. ;)
I actually love how the cake turn out to be soft and crumbly and yet slightly fudgy in the middle, with the contrast of crunchy walnuts and nutty PB chips.

 Moist, chocolaty and all fudgy in the center! And I even tasted mini bits of beetroot in the cake too... such a pleasant surprise. ;)
 
 Another close up in case you didn't catch the gooey goodness earlier. :) 

If you have beetroot, if you adore chocolate, and you love brownies...what are you waiting for? Perhaps it might need more tweaking, but for now, I am happy with it. 

Have a good day ahead everyone!


Friday, April 24, 2015

Chocolate PB Granola Bars

I am always trying to eat healthy lately. No really, I am. I guess it has something to do with my age catching up, so having a healthy balanced meal, especially breakfast, seems really important to me nowadays. Plus I found that eating a well balanced and more wholesome breakfast, will last me satisfied the whole morning without having to sneak a bite later during the mid day. 

So lately I have this craze over granola. Any kind, any flavor, I will chomp it down with my creamy Greek yogurt. :9 One of the tastier granola recipes I found online is from Smitten Kitchen, which she shares her awesome Chunky Maple Granola recipe. One that I always go back to when I run dry of ideas or just plain lazy to create a new one. :P

Well, not this time! Decided to do a simple granola bar recipe which incorporates two of my top favorite ingredients; Chocolate and Peanut Butter. I know I know, its yours too. And thus this Chocolate PB Granola Bar recipe was born...
You got to have something you love to be able enjoy it daily without getting sick of it so easily. No worries, I did the "minimal" amount of these "indulgence", so as to not feeling all fat again when munching on them. :P Besides, looking at the photo above alone already got me feeling all wholesome inside!

Ingredients for Chocolate Peanut Butter Granola Bars (makes a 1" x8"x8")
225g rolled oats
75g walnuts
75g whole almonds
20g sesame seeds
50g sunflower seeds
20g coconut flakes
 
100g dark chocolate, chopped into small chunks
80g dried sweetened cranberries
 
100g smooth natural peanut butter 100
150g honey
1 tbsp coconut oil
pinch of salt
  • Preheat the oven to 180C. Prepare a baking tray lined with parchment paper.
  • In a large mixing bowl, add in the rolled oats, both nuts, sesame seeds, sunflower seeds and coconut flakes. Toss to mix. Then pour out the mixture on to a baking tray. 
  • Bake in the preheated oven for a good 10 minutes, giving it a toss every 5 minutes. 
  • Once toasted, you will smell the nutty fragrance filling the whole house. Oats and nuts will be in darker brown. Remove from oven and let cool slightly while you prepare the rest of the ingredients.
  • Next prepare the liquid mixture. In a bowl, add in the honey, peanut butter and coconut oil, mix well. Place in the microwave and heat up the mixture at 1 minute high.
  • In a large mixing bowl, add in the toasted oats and nuts in. Then add in the chopped chocolate and dried cranberries in as well. Lastly, add in the heated PB mixture.
  • The heat from the PB mixture will gradually melt the chocolate a little, which is ok. The chocolate will be acting as one of the binding agent to hold the granola bar together. So don't panic if you see most of the chocolate melting. 
  • Prepare a square baking tray, lined with parchment paper. Grease the parchment paper as well. Next, pour the granola mixture in the prepared pan.
  • Press down with the back of the spoon to flatten and compress the whole mixture. You want it as pack as possible so it won't fall apart when you unmould and slice later.
  • Place a clean plastic wrap over the surface and then another baking tray over the pressed granola.
  • Place in the fridge to chill for a good 4 hours but preferably overnight.
  • Next day, take it out and remove the baking tray on top and the plastic wrap. The granola should be rock solid. Using the parchment paper to pull the whole granola block out and on a chopping board.
  • Cut the granola up into desired sizes. I cut mine into 10 pieces.
  • It is okay if some of the corners break off. No worries. You can wrap these individually which I am too lazy to do haha. I simply stored them into air tight containers in room temperature or you can chill in the fridge.

 I like mine with honey greek yogurt, best thing in the world. Cold creamy verses crunchy nutty, loving the contrast in texture. Plus that nutty and chocolaty bite is sure to satisfy anyone!

Another close up to show you all that goodness. :9 I can eat this everyday for sure!

Try it out and make your breakfast a wholesome one today...or maybe tomorrow. ;)
Have fun guys!


Tuesday, April 21, 2015

Beetroot bread with Apricot and Cream Cheese

Yes guys, you see right. It's Beetroot bread! I actually had this idea of incorporating beetroot into my bread recipe for the longest time, just never really execute it. It comes to no surprise why I want to try it...mainly because of it's vibrant magenta colour of course. Adding it to bakes just makes it look so "catchy", nice I hope and not in any way scary haha! But often too many times I turned away the idea because I was worried about the stain of the root vegetable getting on my kitchen tiles haha! Well, this time I was well prepared! So these lovely (really la) breads were born. ;9
Okay, the colour does look a little unusual on a bread I admit...but still not bad aye? I'm getting quite fond of that sweet pink in case you don't know haha! But in terms of taste, texture and flavor...I have to say I've got it on point. Yes, I may sound a little overrating my own creation here...but I was truly please with my new bread creation, woot! (Omg...what's with the big head? lol)

Recipe for Beetroot bread 
Pre-fermented dough recipe
250g bread flour
160ml water
3g instant dry yeast
1g salt
  • Knead everything together till it forms a soft pliable dough. No need to be smooth. Divide dough into 50g or100g portions depending on your needs and let chill in fridge up to 12 hours. Alternatively store in freezer up to 3 months.
Main Dough recipe
200g pre-fermented dough (above for recipe)
150 beetroot, pierced, steamed l, peeled and blend (~200g with skin before steam)
300g bread flour

100ml water
20g milk powder
5 g instant active yeast
3 g salt
50g caster sugar
30g unsalted butter room temp

1 tbsp unsweetened cocoa powder


  • Rinse the beetroot clean, then pierce with a sharp knife so it will steam up easier. Then place the whole root vegetable into the steamer over medium high fire. Steam for a good 15minutes or till a toothpick can pierce into it easily. 
  • Remove from steamer and let cool before working on it. 
  • Please wear cloths before handling the beetroot...unless you don't mind having pink hand for the next day or two! Peel the beetroot, cut into large chunks.
 
  • Place the beetroot chunks into the blender and blend till puree. Need about a good minute on that.
  • Then in the mixer, add in pre-fermented dough, beetroot puree, bread flour, caster sugar, salt, instant active yeast, milk powder and water. 
  • Starts kneading till the dough comes together. It might be sticky at first, but DO NOT be tempted to add in more flour. Give it time to knead through 8-10minutes, break 2 minutes, knead another 8-10 minutes till the dough pulls away from the mixer bowl completely.
  •  Just look at the vibrant pink! No edit at all, this is the true natural colours of beetroot bread dough. Love much aye?
  •  Once the dough pulls away from the bowl, add in the unsalted butter and continue to knead. It should take at most another 4-5 minutes for the dough to knead through and pull away from the mixing bowl or reaches window panel.

  •  Okay I have to admit guys, it's hard to stretch the dough to thin window panel in one hand while the other is holding that heavy DSLR trying to snap a good picture. So pardon me if this picture didn't really show the window panel clearly, but you get the idea ya?
  • Place dough in a greased bowl and let proof covered for 1.5hrs or till the dough doubled in size.
  • In the meantime, make your apricot and cream cheese filling.
Ingredients for Cream cheese filling
150g cream cheese 
30g confectioners sugar
20g unsalted butter

100g dried apricot 
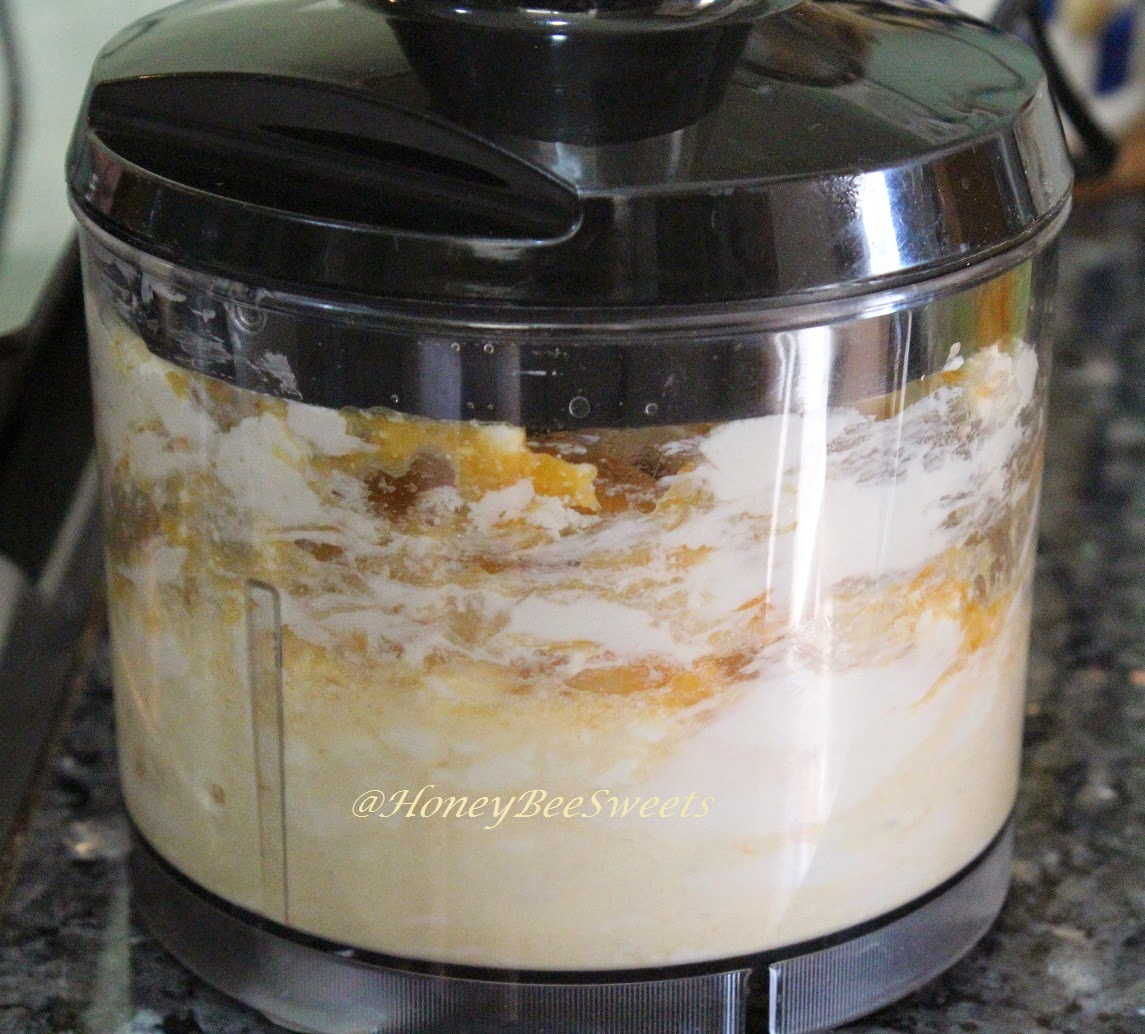
  • In the blender, add in all the ingredients except the apricots. Zap at high speed till the mixture is smooth and creamy. Scoop out and set aside for use later.
  • Next you cut the apricots into smaller chunks.

  • By now the dough should have already doubled. Check out the big pink ball!

  • Punch out the air and divide out dough portions of 520g and 80g. The remaining dough can be shaped into a flower bun like what I did. Where each ball is about 50g.
  • Roll out the 520g into a flat rectangle of 35cm by 25cm. Then spread the cream cheese mixture over the rectangle dough surface, leaving about 1 inch of allowance on the sides.
 
  •  Next you sprinkle the cut up apricot chunks over the surface as seen above. Distributing the dried fruit evenly over the surface.
  • Then from the shorter end, roll it up like a swiss roll.

  • Once you rolled all the way to the end, seal up the sides by pinching in the dough.

  • Once sealed, gently place the whole rolled up dough into a greased loaf pan.
  • Next you can make some patterns using the remaining 90g dough; divide into 3 equal portions of 30g. Roll into long logs about slightly longer then the length of the loaf pan. Pleat into a ponytail and place over the loaf in the pan.

  • Shaping the flower buns is easy. just divide the dough into 7 equal portions. Take one of the portion and add in 1 tbsp of unsweetened cocoa powder and knead in. The colour will become slightly darker. The rest of the 6 dough just roll round and seal necessary edges. Place the dark brown dough in the center and the rest of the six buns around it. I have chose to leave these buns plain without filling. Feel free to fill them with anything you fancy.
  • Let the shaped out doughs proof. It should take no longer then 45minutes. Preheat the oven to 175C in the meantime. (My oven is slightly on the high side) Mama Mia...look at the colour! I swear I didn't add filters!
  • Once the dough in the loaf pan proof and filled till rim of the pan, it's ready to be baked. Bake in the preheated oven. 20-23 minutes for the flower buns while 28-30 minutes for the loaf.
The dough did becomes a little toasty brown on the surface after baking, but it still look awesome. ;) And if you follow me on Instagram, you would have seen how I have torn up my bread in that little "bread porn" video to demonstrate the fluffiness and softness of the bread. Yes go watch and don't get too excited about it please haha!
A look at the sliced interior...since I ain't uploading any video here haha. Ahh...so loving the well proofed interior! Though the cream cheese filling did weigh down a little but it was so delicious, I regret not adding it in at all! :9 
Of course the bread is delicious on it's own. But with a little more butter and wildflower honey, it gonna taste amazing, yummy! So happy that my first attempt of this beetroot bread turned out successful! Gonna attempt more exciting flavors real soooon! Why? Because I love bread and I love baking it even more!

Have a great day ahead all!

Friday, April 17, 2015

Mango Sticky Rice Cake / Cupcake

This is kinda unintentional. Baking this Mango Sticky rice cake I mean. :P As much as I love my Mango Sticky Rice dessert, I can only eat that much. And considering I made enough to feed 6 people...huh huh. :P Portion baby! Yeah...still need to work on that sometimes. But being the practical me...I ain't gonna throw those delicious coconut glutinous rice away, no siree! And recreating them into cakes / cupcakes is the next best thing. :9
So this recipe is my own creation, one of a kind ....so stay on at your own risk, heh heh. And if you decided to give this a go (thank you very much), you will need to refer to my previous post "Mango Sticky Rice" for some of the steps involve as well. ;) Now let's get on with it shall we?

Recipe for Mango Sticky Rice Cake/Cupcake  
200g glutinous coconut sticky rice (refer to here for recipe)
60ml coconut milk
50ml cold pressed coconut oil
2 large eggs
100ml fresh milk
70g cake flour
1.5 tsp baking powder
80g caster sugar
1/2 tsp salt
1 large ripe mango
1 pack 100g dried sweetened mango slices (optional)
  • Preheat oven to 170C. Line a loaf pan with parchment and grease well. You can also make a smaller loaf and use the remaining batter to make small cupcakes.
  • In a blender container, add in the glutinous sticky rice. If it was from the fridge, steam or microwave it till slight warm for easier blending.

  •  Next you add in the coconut milk and coconut oil.

  •  Give it a quick blend for about 30 seconds. It should look like the mixture below. It is okay if the coconut oil is a little separated from the mixture.
 
  •  Next add in the milk, caster sugar, eggs and salt. Blend for another 1 to 2 minutes.

  •  The mixture should look as follows. Slightly grainy but shouldn't be too thick.
  •  Pour the mixture into a large mixing bowl and sift in the flour and baking powder.
  • Gently stir in with a whisk until the mixture is smooth with no lumps.
  • Scoop the batter into prepared pan and cupcake liners.
  • At this point, you can insert that slice of sweetened dried mango slice into the cupcakes. I love the idea of adding more bite and texture into the cake. ;)
  • Bake the cakes in the preheated oven, 12 minutes for the small cupcakes, 15 for large cupcakes and 30 minutes for small loaf, 45 minutes for large loaf. Use a cake tester or a toothpick to test for doneness. 
  •  Cool on the rack completely in the meantime while you move on to make the mango buttercream.

Recipe for Mango Buttercream

150g vanilla buttercream (you can get the buttercream recipe here
100g fresh mango
50g cream cheese
  • Place all the ingredients in the blender and blend till it is smooth and creamy. Chill in the fridge till slightly firm.
  •  
  • Spoon the mixture into a piping bag and pipe over the cupcakes and loaf. Decorate with fresh mango slices if desired.

 You can of course enjoy the cake on its own, but adding the mango buttercream just makes it more luscious and moist. Who doesn't love some good fruity flavored buttercream on that cupcake?!
 See that creamy goodness? And how can you say no to that...haha!
Check out the texture! Fluffy soft interior with a creamy coconut rice fragrance. Texture has a unique chew and yet soft and creamy after taste. My hubby actually prefer my Black Glutinous Rice Cupcakes, but I prefer this. ;P I guess the only way to find out is to try baking both to find out...yeah go try it. ;)

 I love the idea of incorporating local authentic dessert flavors into cakes and cupcakes. Same same but different different. ;)

 Okay guys, have a good day ahead and a fabulous weekend. Remember to bake something. ;)